Configure Automatically BitLocker OS Drive and store BitLocker Recovery Keys in AD – Complete Guide with Troubleshooting
STEP 1: Install Bitlocker Drive Encryption
Server manager: Mange > Add roles and features under features: Bitlocker Drive encryption
We have made quality our habit. It’s not something that we just strive for – we live by this principle every day.
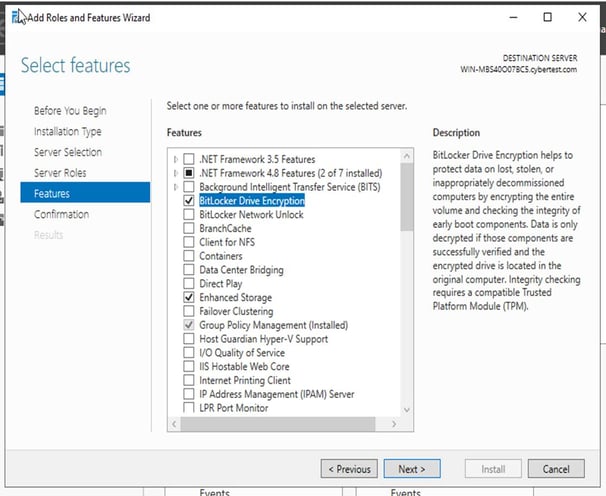

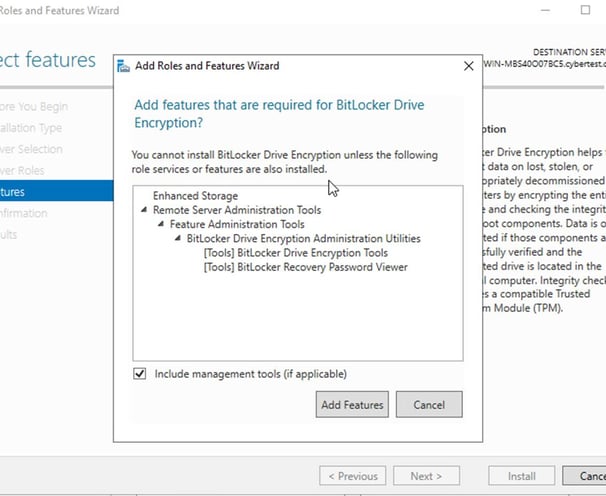

Configuring GPO to Save BitLocker Recovery Keys in Active Directory
Create a new GPO using the Group Policy Management console (GPMC.msc). Link it to the root of the domain or OU, that contains the computers for which you want to store BitLocker Recovery Password in the Active Directory database
We have made quality our habit. It’s not something that we just strive for – we live by this principle every day.
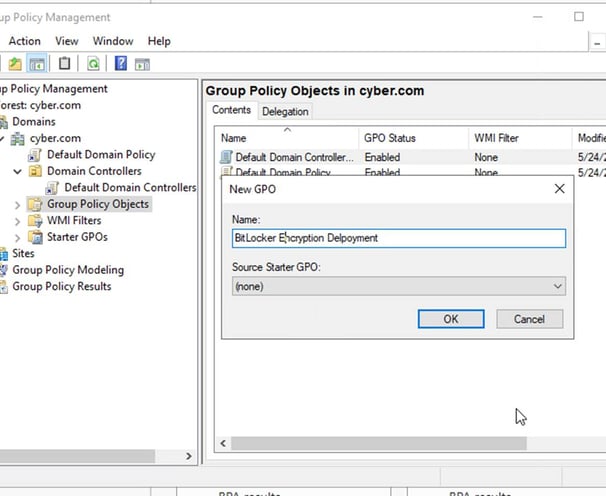

Right-click on this GPO and select Edit;
We have made quality our habit. It’s not something that we just strive for – we live by this principle every day.
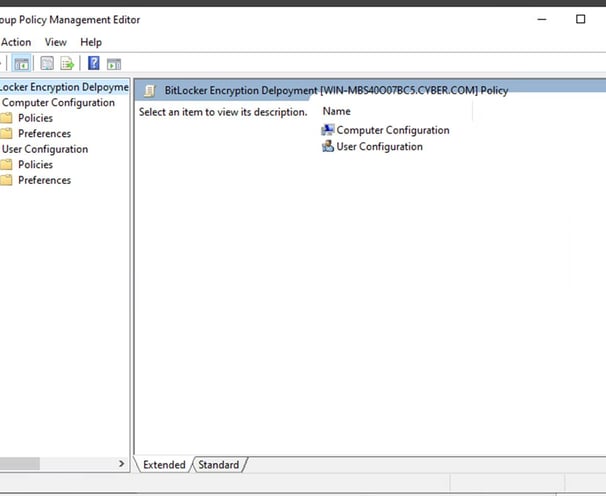

Expand the GPO sections: Computer Configuration > Policies > Administrative Templates > Windows Components > BitLocker Drive Encryption. Edit the policy Store BitLocker Recovery information in Active Directory Domain Services
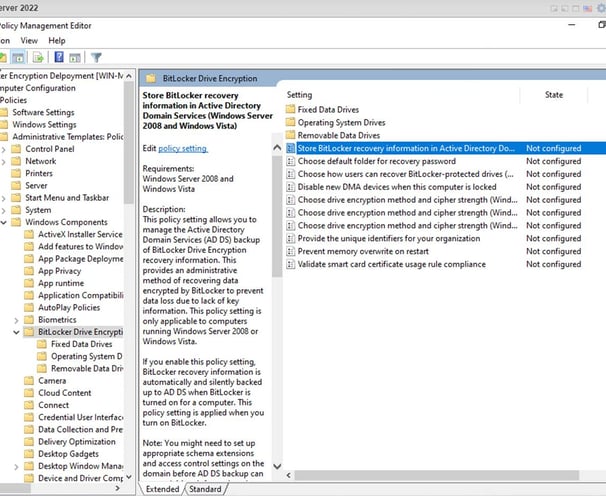

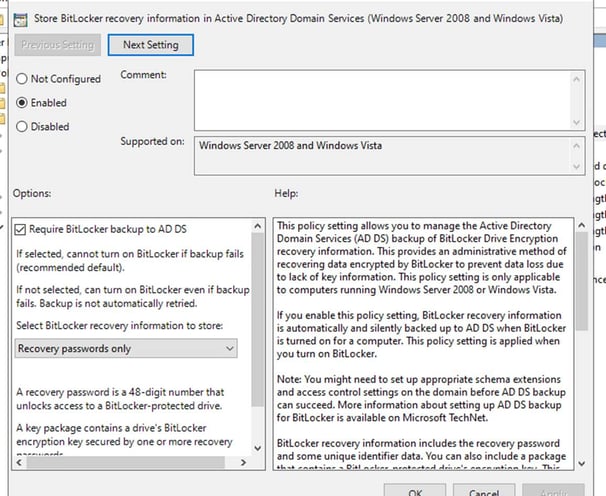
Enable this policy and configure it as follows: Require BitLocker backup to AD DS: Enable. Select BitLocker recovery information to store: Recovery passwords and key packages. You can store only the recovery password in AD, or password and recovery key together.
We have made quality our habit. It’s not something that we just strive for – we live by this principle every day.

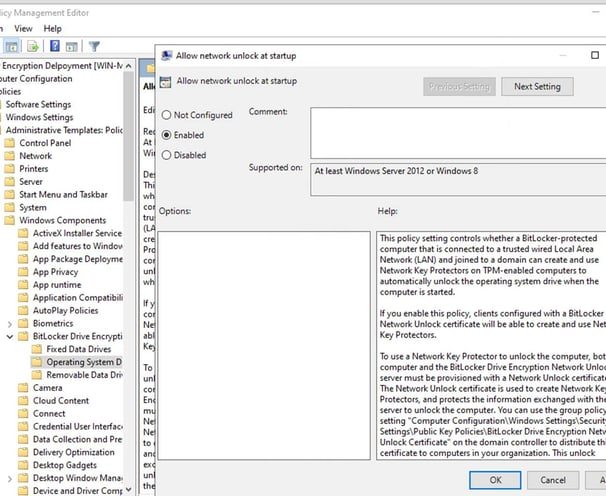
Operating System Drives;
Enable the policy Allow net unlock at startup

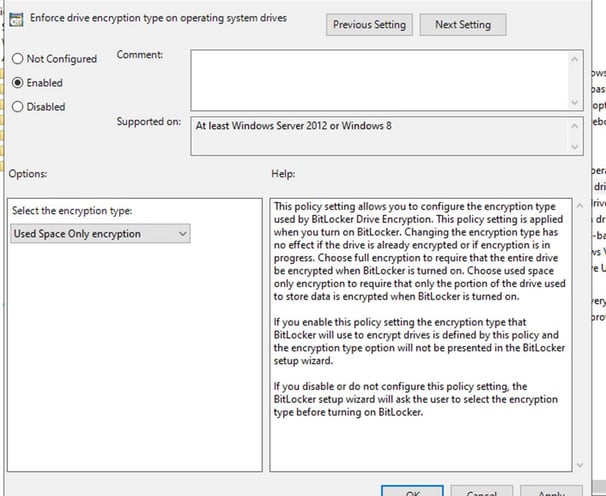
Enable the policy - Enforce drive encryption type on fixed data drives and select the type of encryption but here we will recommend “Used space only encryption”. Selecting “used space only encryption”, will encrypt the data used now or written in the future.

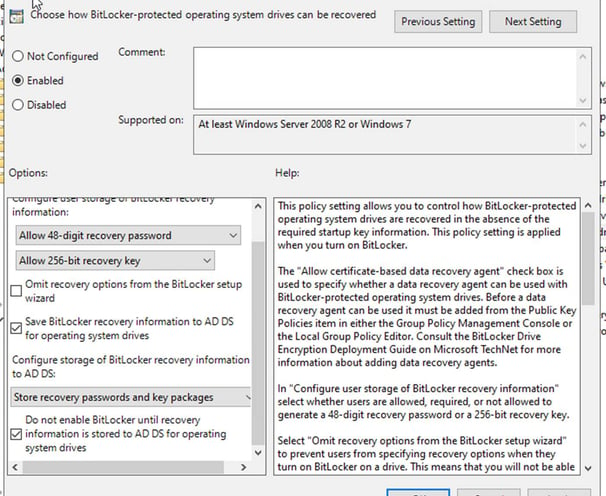
Enable the policy. Configure user storage of BitLocker recovery information: Allow 48-digit recovery password and allow 256-bit recovery key. Check the following options: Allow data recovery agent, Save BitLocker recovery information to Active Directory Domain Services, and Do not enable BitLocker until recovery information is stored to AD DS for removable data drives. The last option ensures that the user cannot turn on BitLocker if the computer is not connected to the domain and the BitLocker recovery information is successfully backed up to AD DS. When the user tries to encrypt a new USB device at the time it’s not connected to a domain network, the user will receive an error message.

Step 2: We are going to add to this policy a task scheduler that will actually enable BitLocker using our script
Go to Group Policy Management Editor – BitLocker Encryption Deployment – Computer Configuration – Preferences – Control Panel settings – Scheduled Tasks
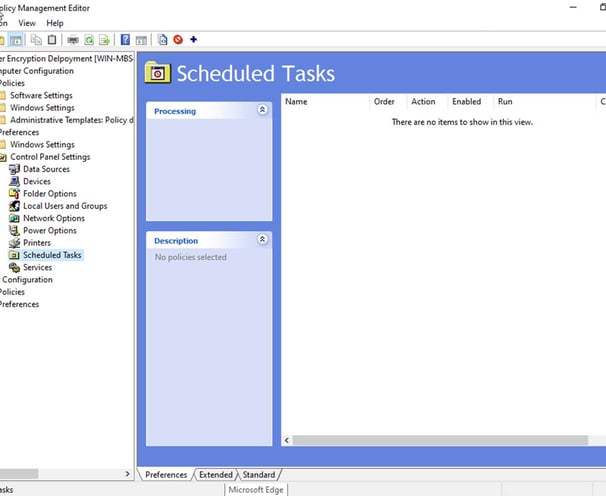

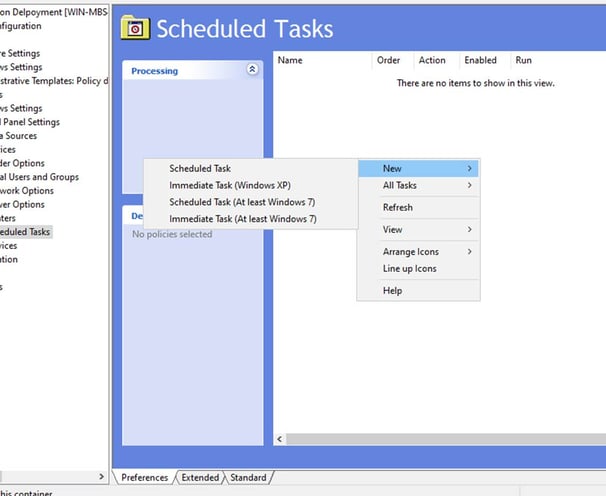
Right click new task and choose scheduled Task “At least Windows 7”

Give the BitLocker OS Drive. Click on Change user or Group – Object Types and add Group and then press ok
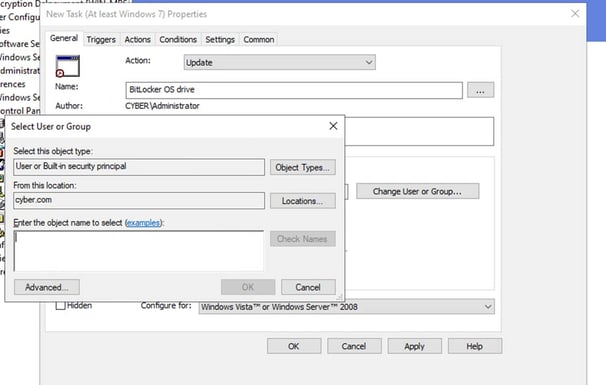

Next, click on advanced – find now - scroll down and look for System and press okay
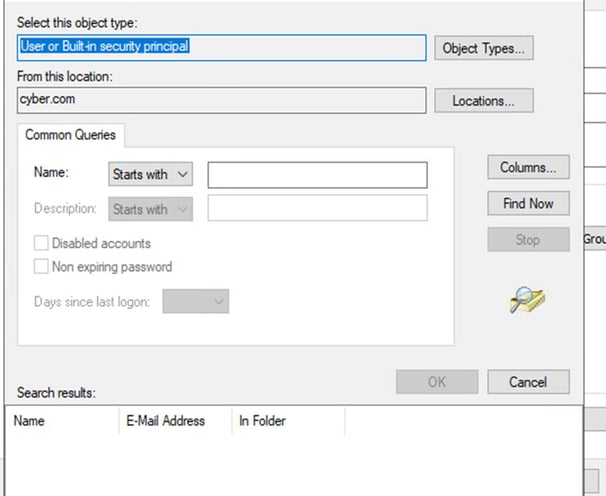

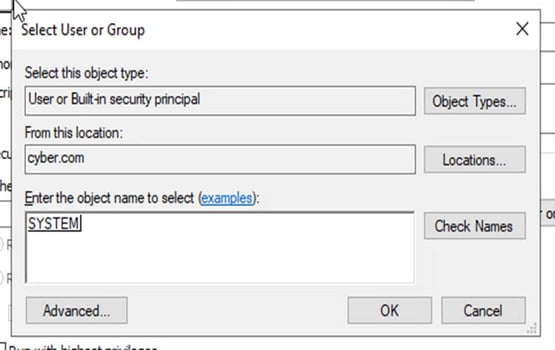

Choose “Run whether user is logged or not” and click on “Run with highest privileges”
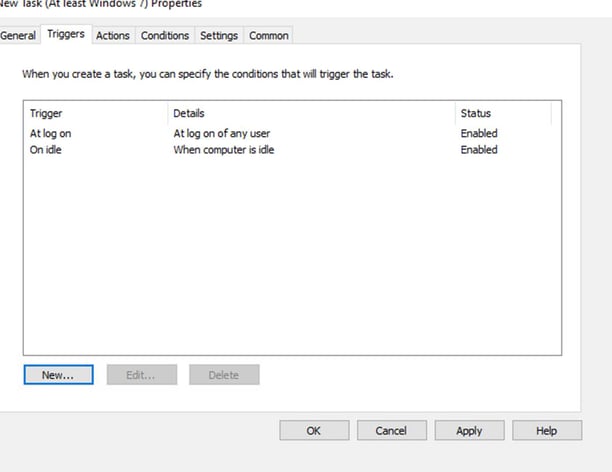
Next, we click on Triggers – New.
To begin the task, we choose “At log on” and then click on “delay task for” Adjust the time to your liking, to make sure the network and everything is established before it tries to encrypt the drive. Press okay
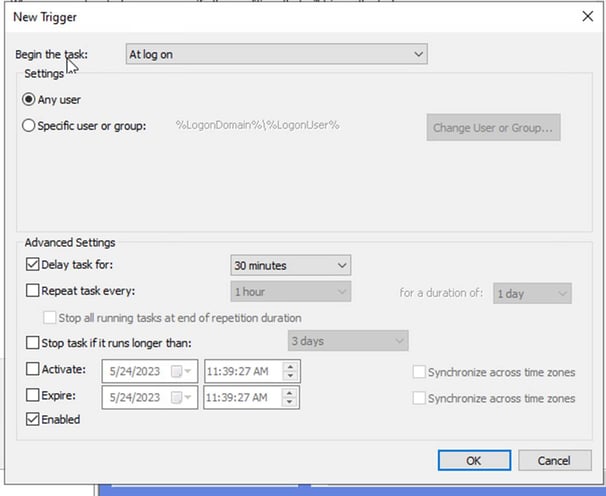

Create another trigger call on idle by clicking on new – choose “on idle”. This trigger will allow this policy to get created without requiring the users to reboot their machines. Make sure that it’s enabled and press okay.

Next step is to share the BitLocker file, so users are the machines can get to that file.
We have to make sure that computers have permission to this folder by doing:
Right-click on the file where you saved the script - go to property
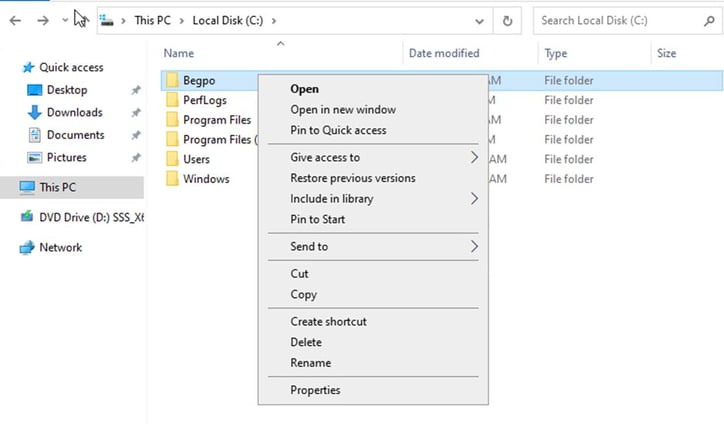

Security – edit - add
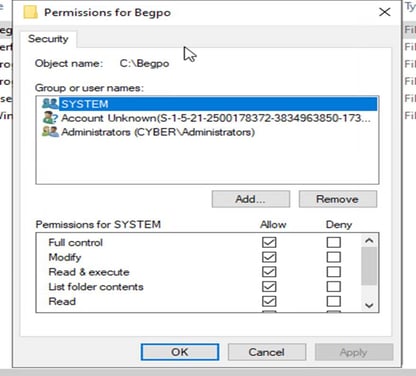

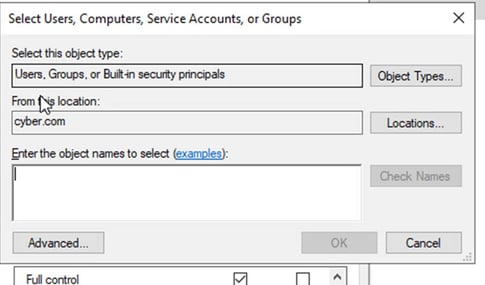

In entering the object names select type “Domain Computer: Domain Users” and press okay
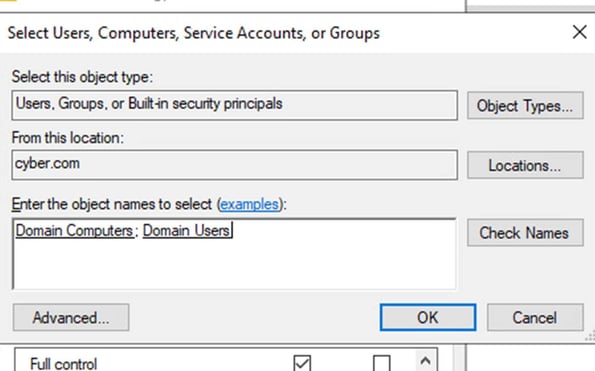

Click on allow and apply
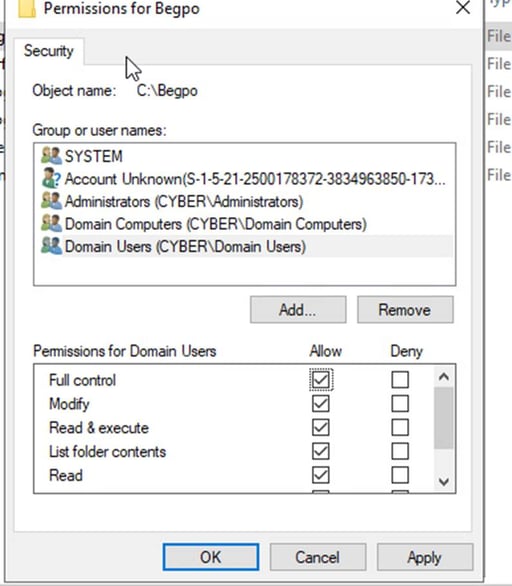

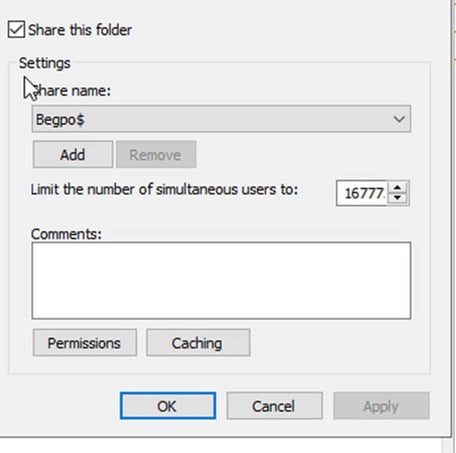
Now we click on Sharing – Advanced sharing – click on share this folder, enter your folder name in share name, and add a $ sign at the end. Here our share name folder is Begpo for bitlocker GPO

Click on permission and make sure that the permission is on read then press okay
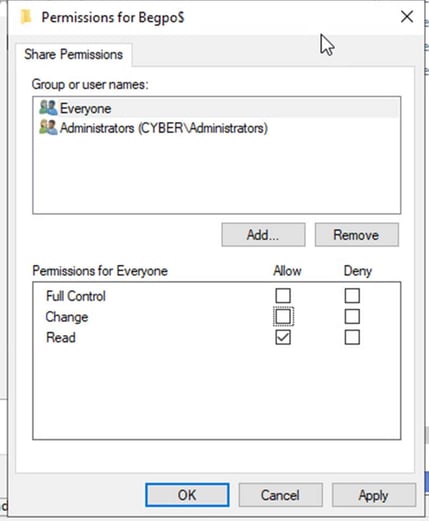

Now we have the shared folder.
Go back to the server
On the schedule that you click on action – new
Action: start a program
Settings
Program /script: write
Powershell.exe
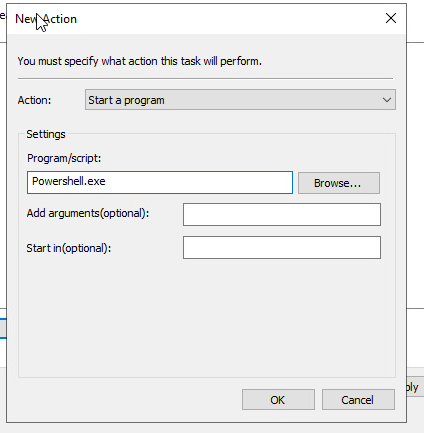

Add arguments (optional): Here we have to add the path to our share script folder
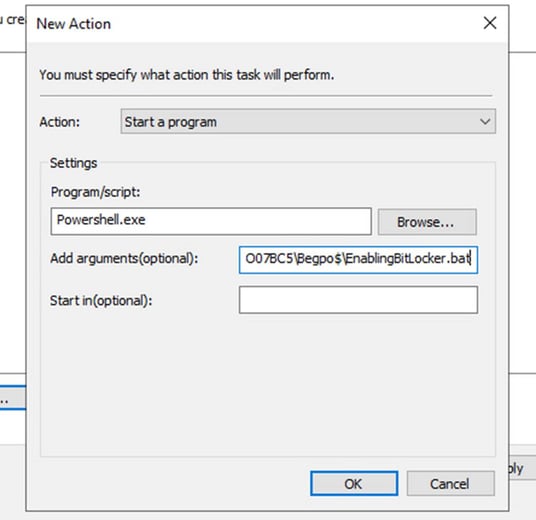

After adding the path we click on apply then okay
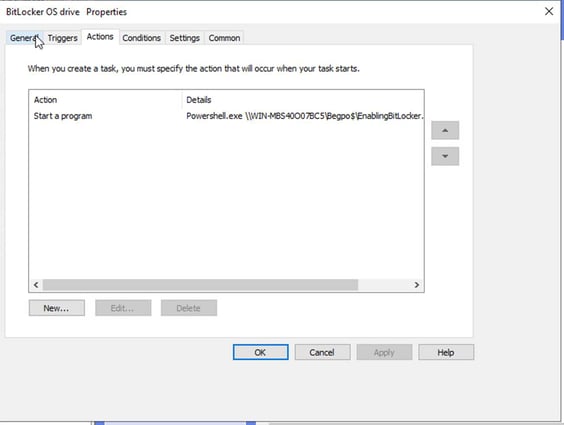

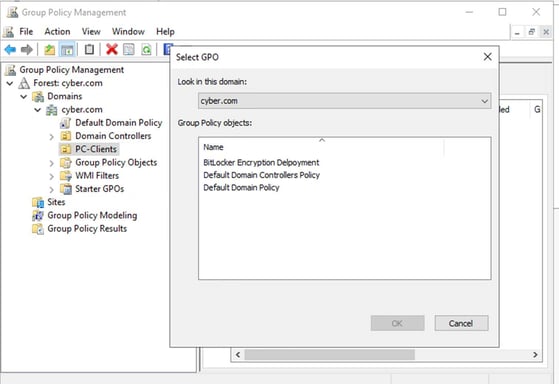
Next step is to apply the policy to the OU that our computers are in

STEP 3- WINDOWS 10
You can also run a test on the client’s computer to see if everything works by going to the client’s computer.
Open PowerShell and run gpupdate /force
And gpresults /r
To see if the encryption was installed on it.
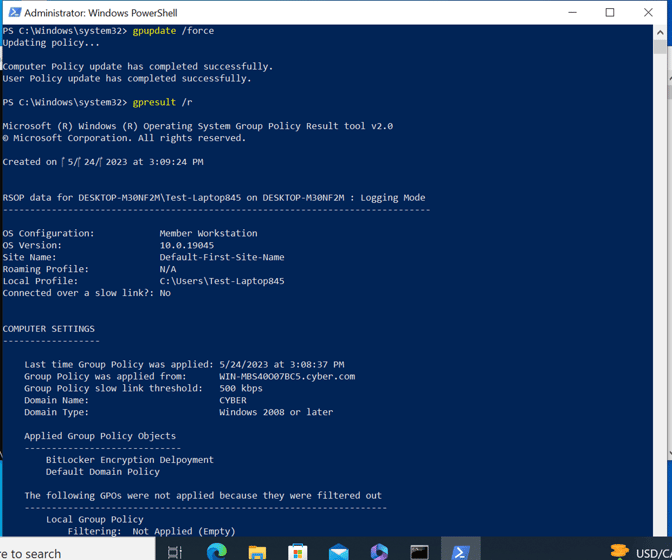

You can also double-check that the task is scheduled by going through it. You will have Bitlocker OS drive encryption.
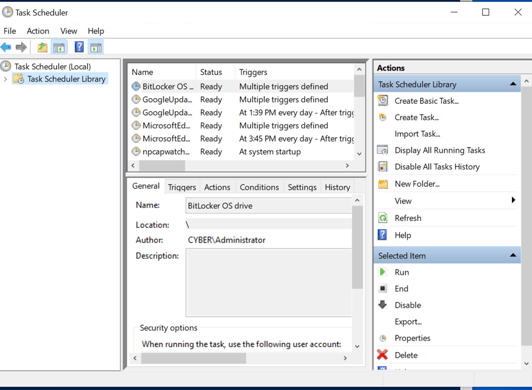

After a couple of minutes, we can see that the encryption worked and the disk is being encrypted
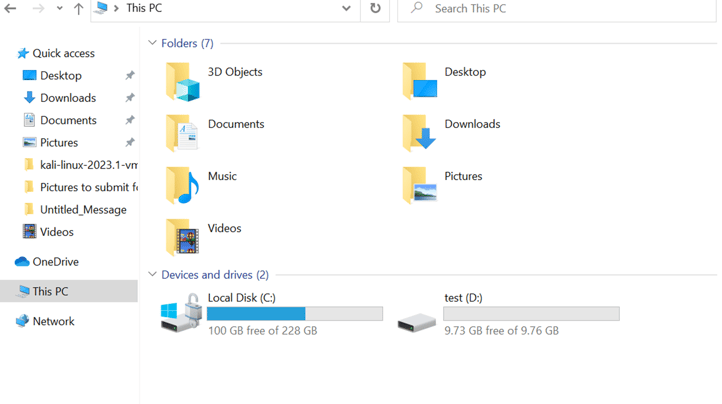

STEP 4: How to Find BitLocker Recovery Keys in Active Directory?
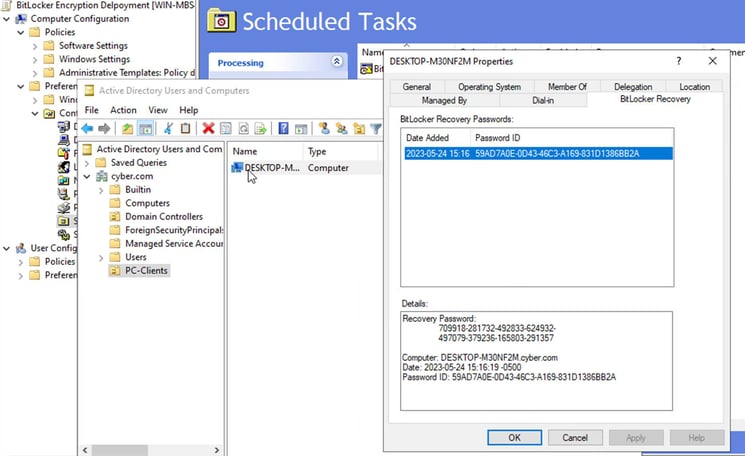
You can find available recovery keys for each computer on the new tab “BitLocker Recovery”. It is located in the computer account properties in the Active Directory Users and Computers snap-in.
You can see the following info on this tab:
Recovery Key — you can give this key to the user to decrypt Bitlocker drive in case of OS failed, or if a user forgets the Bitlocker password;
Computer name and date when the Bitlocker recovery data was added to AD;
Password ID — user must provide the first 4 or 8 characters from the PasswordID to you.

In order to download the Bitlocker script, click on this link "Bitlocker-script"