Wazuh Deployment
Installation guide
Wazuh is a security platform that provides unified XDR and SIEM protection for endpoints and cloud workloads. The solution is composed of a single universal agent and three central components: the Wazuh server, the Wazuh indexer, and the Wazuh dashboard.
Wazuh Indexer
The installation process is divided into three stages.
Initial configuration
Wazuh indexer nodes installation
Cluster initialization
1. Initial configuration
Here we will create the SSL certificates to encrypt communications between the Wazuh components and generate random passwords to secure your installation.
a- Download the Wazuh installation assistant and the configuration using this command.
# curl -sO https://packages.wazuh.com/4.4/wazuh-install.sh
# curl -sO https://packages.wazuh.com/4.4/config.yml


b- Edit ./config.yml and replace the node names and IP values with the corresponding names and IP addresses. You need to do this for all Wazuh server, Wazuh indexer, and Wazuh dashboard nodes. Add as many node fields as needed.
Using the command nano config.yml
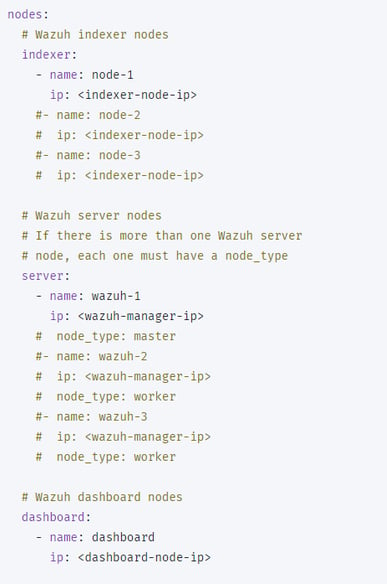

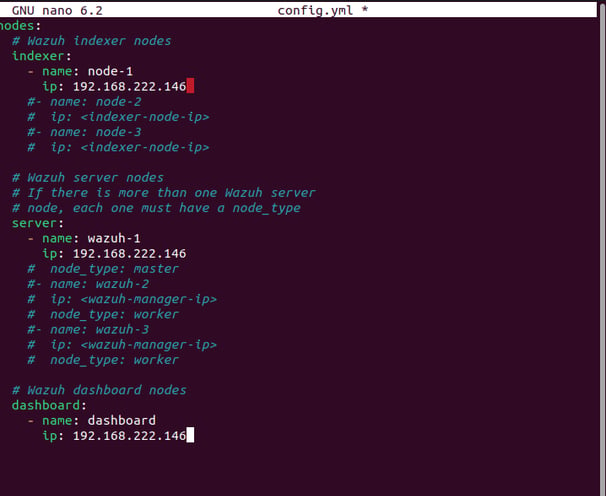

c- Run the assistant with the option --generate-config-files to generate the Wazuh cluster key, certificates, and passwords necessary for installation. You can find these files in ./wazuh-install-files.tar.
# bash wazuh-install.sh --generate-config-files


d- Copy the wazuh-install-files.tar file to all the servers of the distributed deployment, including the Wazuh server, the Wazuh indexer, and the Wazuh dashboard nodes.
2. Wazuh indexer nodes installation
Install and configure the Wazuh indexer nodes.
a- Download the Wazuh installation assistant.


a- Run the assistant with the option --wazuh-indexer and the node name to install and configure the Wazuh indexer. The node name must be the same one used in config.yml for the initial configuration, for example, node-1.
Note: Make sure that a copy of wazuh-install-files.tar, created during the initial configuration step, is placed in your working directory.
# bash wazuh-install.sh --wazuh-indexer node-1
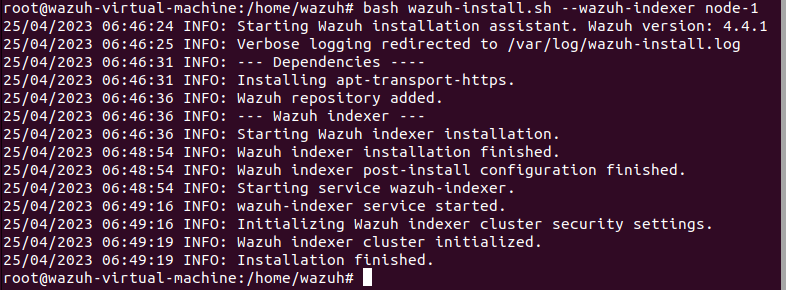

Repeat this stage of the installation process for every Wazuh indexer node in your cluster. Then proceed with initializing your single-node or multi-node cluster in the next stage.
3. Cluster initialization
The final stage of installing the Wazuh indexer single-node or multi-node cluster consists of running the security admin script.
a- Run the Wazuh installation assistant with option --start-cluster on any Wazuh indexer node to load the new certificate information and start the cluster.
# bash wazuh-install.sh --start-cluster


Note: You only have to initialize the cluster once, there is no need to run this command on every node.
Testing the cluster installation
a- Run the following command to get the admin password:
# tar -axf wazuh-install-files.tar wazuh-install-files/wazuh-passwords.txt -O | grep -P "'admin'" -A 1

b- Run the following command to confirm that the installation is successful. Replace <ADMIN_PASSWORD> with the password gotten from the output of the previous command. Replace <WAZUH_INDEXER_IP> with the configured Wazuh indexer IP address:
# curl -k -u admin:<ADMIN_PASSWORD> https://<WAZUH_INDEXER_IP>:9200
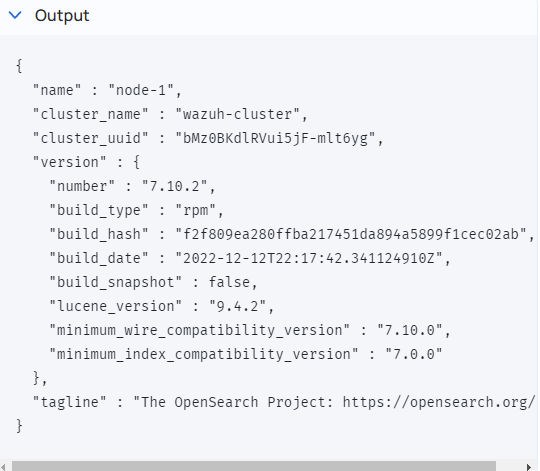

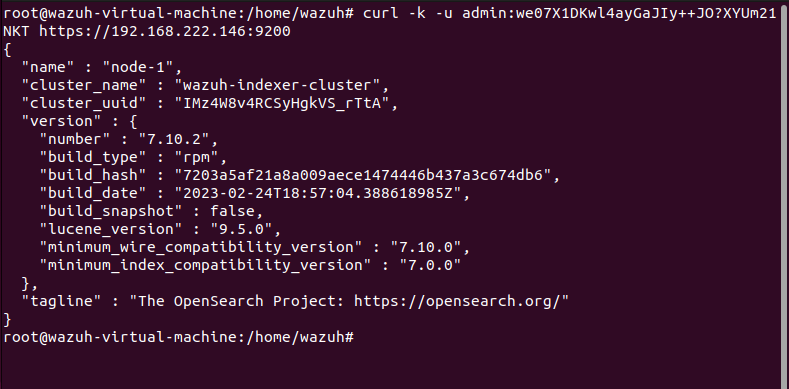

c- Replace <WAZUH_INDEXER_IP> and <ADMIN_PASSWORD>, and run the following command to check if the cluster is working correctly:
# Curl -k -u admin:<ADMIN_PASSWORD> https://<WAZUH_INDEXER_IP>:9200/_cat/nodes?v


Wazuh Server
The Wazuh server is in charge of analyzing the data received from the agents and triggering alerts when threats or anomalies are detected. This central component includes the Wazuh manager and Filebeat.
Wazuh server cluster installation
a- Download the Wazuh installation assistant.
# curl -sO https://packages.wazuh.com/4.4/wazuh-install.sh
b- Run the assistant with the option --wazuh-server followed by the node name to install the Wazuh server. The node name must be the same one used in config.yml for the initial configuration, for example, wazuh-1.
Note: Make sure that a copy of the wazuh-install-files.tar, created during the initial configuration step, is placed in your working directory.
# bash wazuh-install.sh --wazuh-server wazuh-1
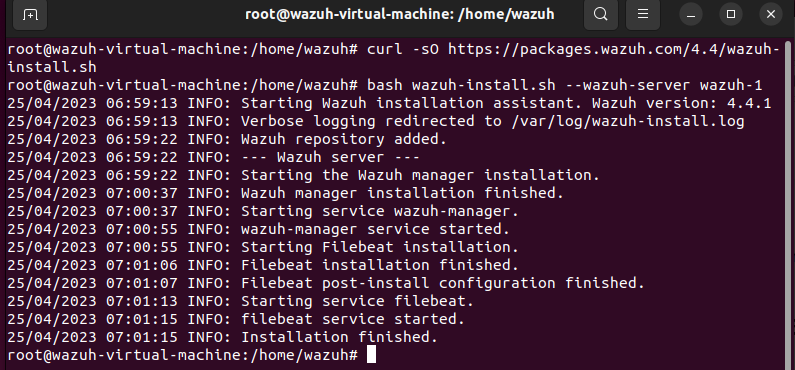

Your Wazuh server is now successfully installed.
Wazuh Dashboard
a- Download the Wazuh installation assistant. This step can be skipped if you have already installed Wazuh indexer on the same server.


a- Run the assistant with the option --wazuh-dashboard and the node name to install and configure the Wazuh dashboard. The node name must be the same one used in config.yml for the initial configuration, for example, dashboard.
Note: Make sure that a copy of the wazuh-install-files.tar file, created during the initial configuration step, is placed in your working directory.
# bash wazuh-install.sh --wazuh-dashboard dashboard
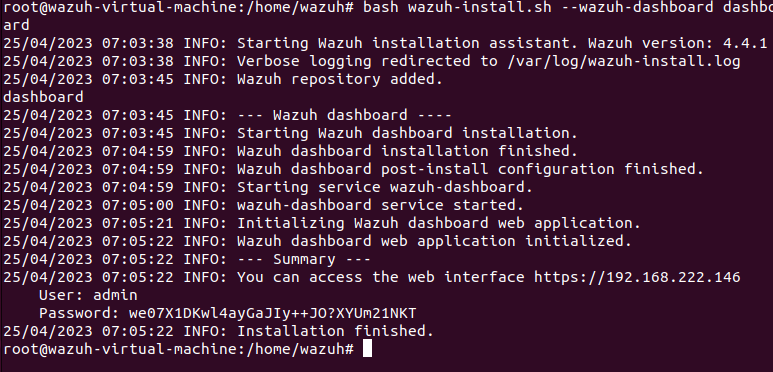

Once the assistant finishes the installation, the output shows the access credentials and a message that confirms that the installation was successful.
INFO: --- Summary ---
INFO: You can access the web interface https://<wazuh-dashboard-ip>
User: admin
Password: <ADMIN_PASSWORD>
INFO: Installation finished.
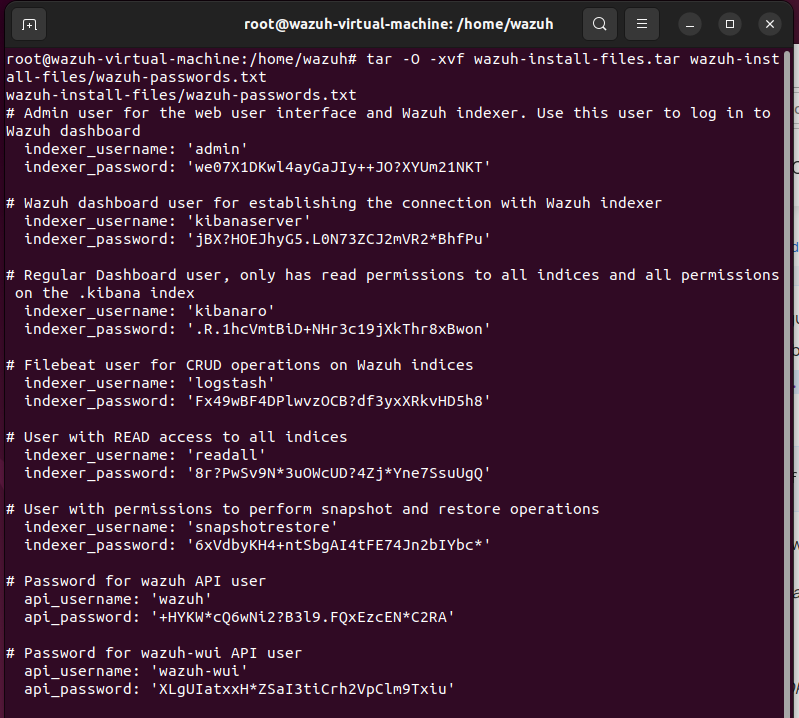
You now have installed and configured Wazuh. All passwords generated by the Wazuh installation assistant can be found in the wazuh-passwords.txt file inside the wazuh-install-files.tar archive. To print them, run the following command:
# tar -O -xvf wazuh-install-files.tar wazuh-install-files/wazuh-passwords.txt

c- Access the Wazuh web interface with your credentials.
URL: https://<wazuh-dashboard-ip>
Username: admin
Password: <ADMIN_PASSWORD>
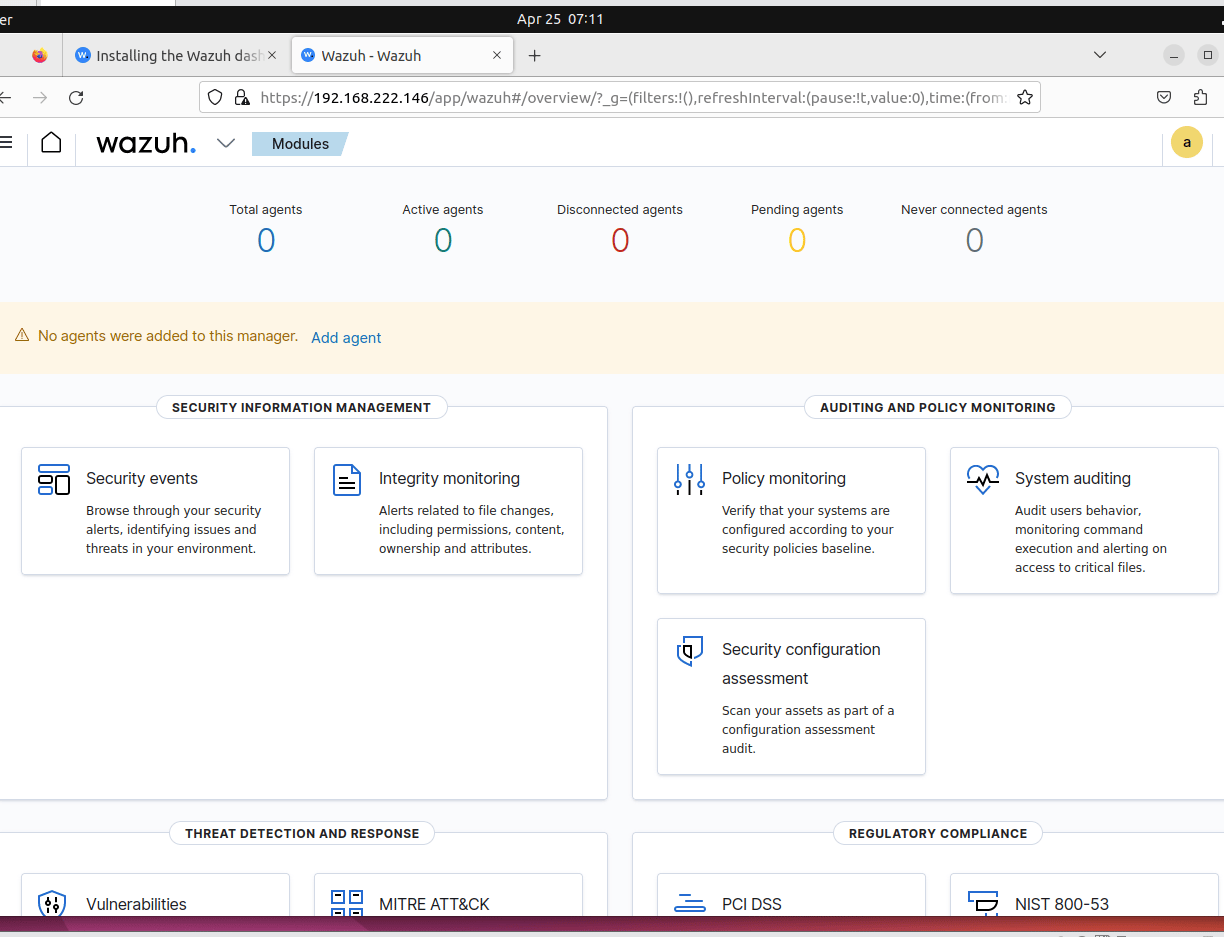

Warning: In case the API is not working
“Could not connect to API id [default]: 3099 - ERROR3099 - Wazuh not ready yet ||| could not connect to API id [wazuhapi]: 3099 - ERROR3099 - Invalid credentials #4208”
DO THIS:
Check the file /usr/share/wazuh-dashboard/data/wazuh/config/wazuh.yml and see password: wazuh-wui if the password change, your API won’t work. You have to make that everything is similar to this:
“
hosts:
- default:
url: https://<your wazuh server ip or localhost if is an all in one>
port: 55000
username: wazuh-wui
password: wazuh-wui
run_as: false
”
Use the command “ nano wazuh.yml” to edit the password
To save the change do
Ctrl ^ X
Press Y
Then Enter to save it
After that, you can double-check if all the services are running correctly and everything should be working after that:
systemctl status wazuh-manager (In the wazuh server)
systemctl status filebeat (In the wazuh server)